Adding an Image Block
Drag the Image block from the block palette into your email canvas. Click the block to choose an image source:- Asset Library: Select from previously uploaded images
- Upload: Add a new image from your device
- Unsplash: Search and insert free stock photos
Resizing
You can resize images in two ways:- Drag the handle on the image directly in the editor to adjust width visually
- Width percentage in the sidebar: Set an exact width from 0 to 100% of the email content area
Sidebar Settings
Select an image block to configure the following in the sidebar:- Alignment: Left, center, or right
- Alt Text: Describe the image for accessibility. Screen readers and email clients that block images will display this text instead.
- Shape: Crop the image into a shape (see below)
- Border Radius: Round the corners of the image
- Border Color: Set a border color around the image
- Border Width: Control the thickness of the border. Click the expand icon to set a different width for each side.
Shape
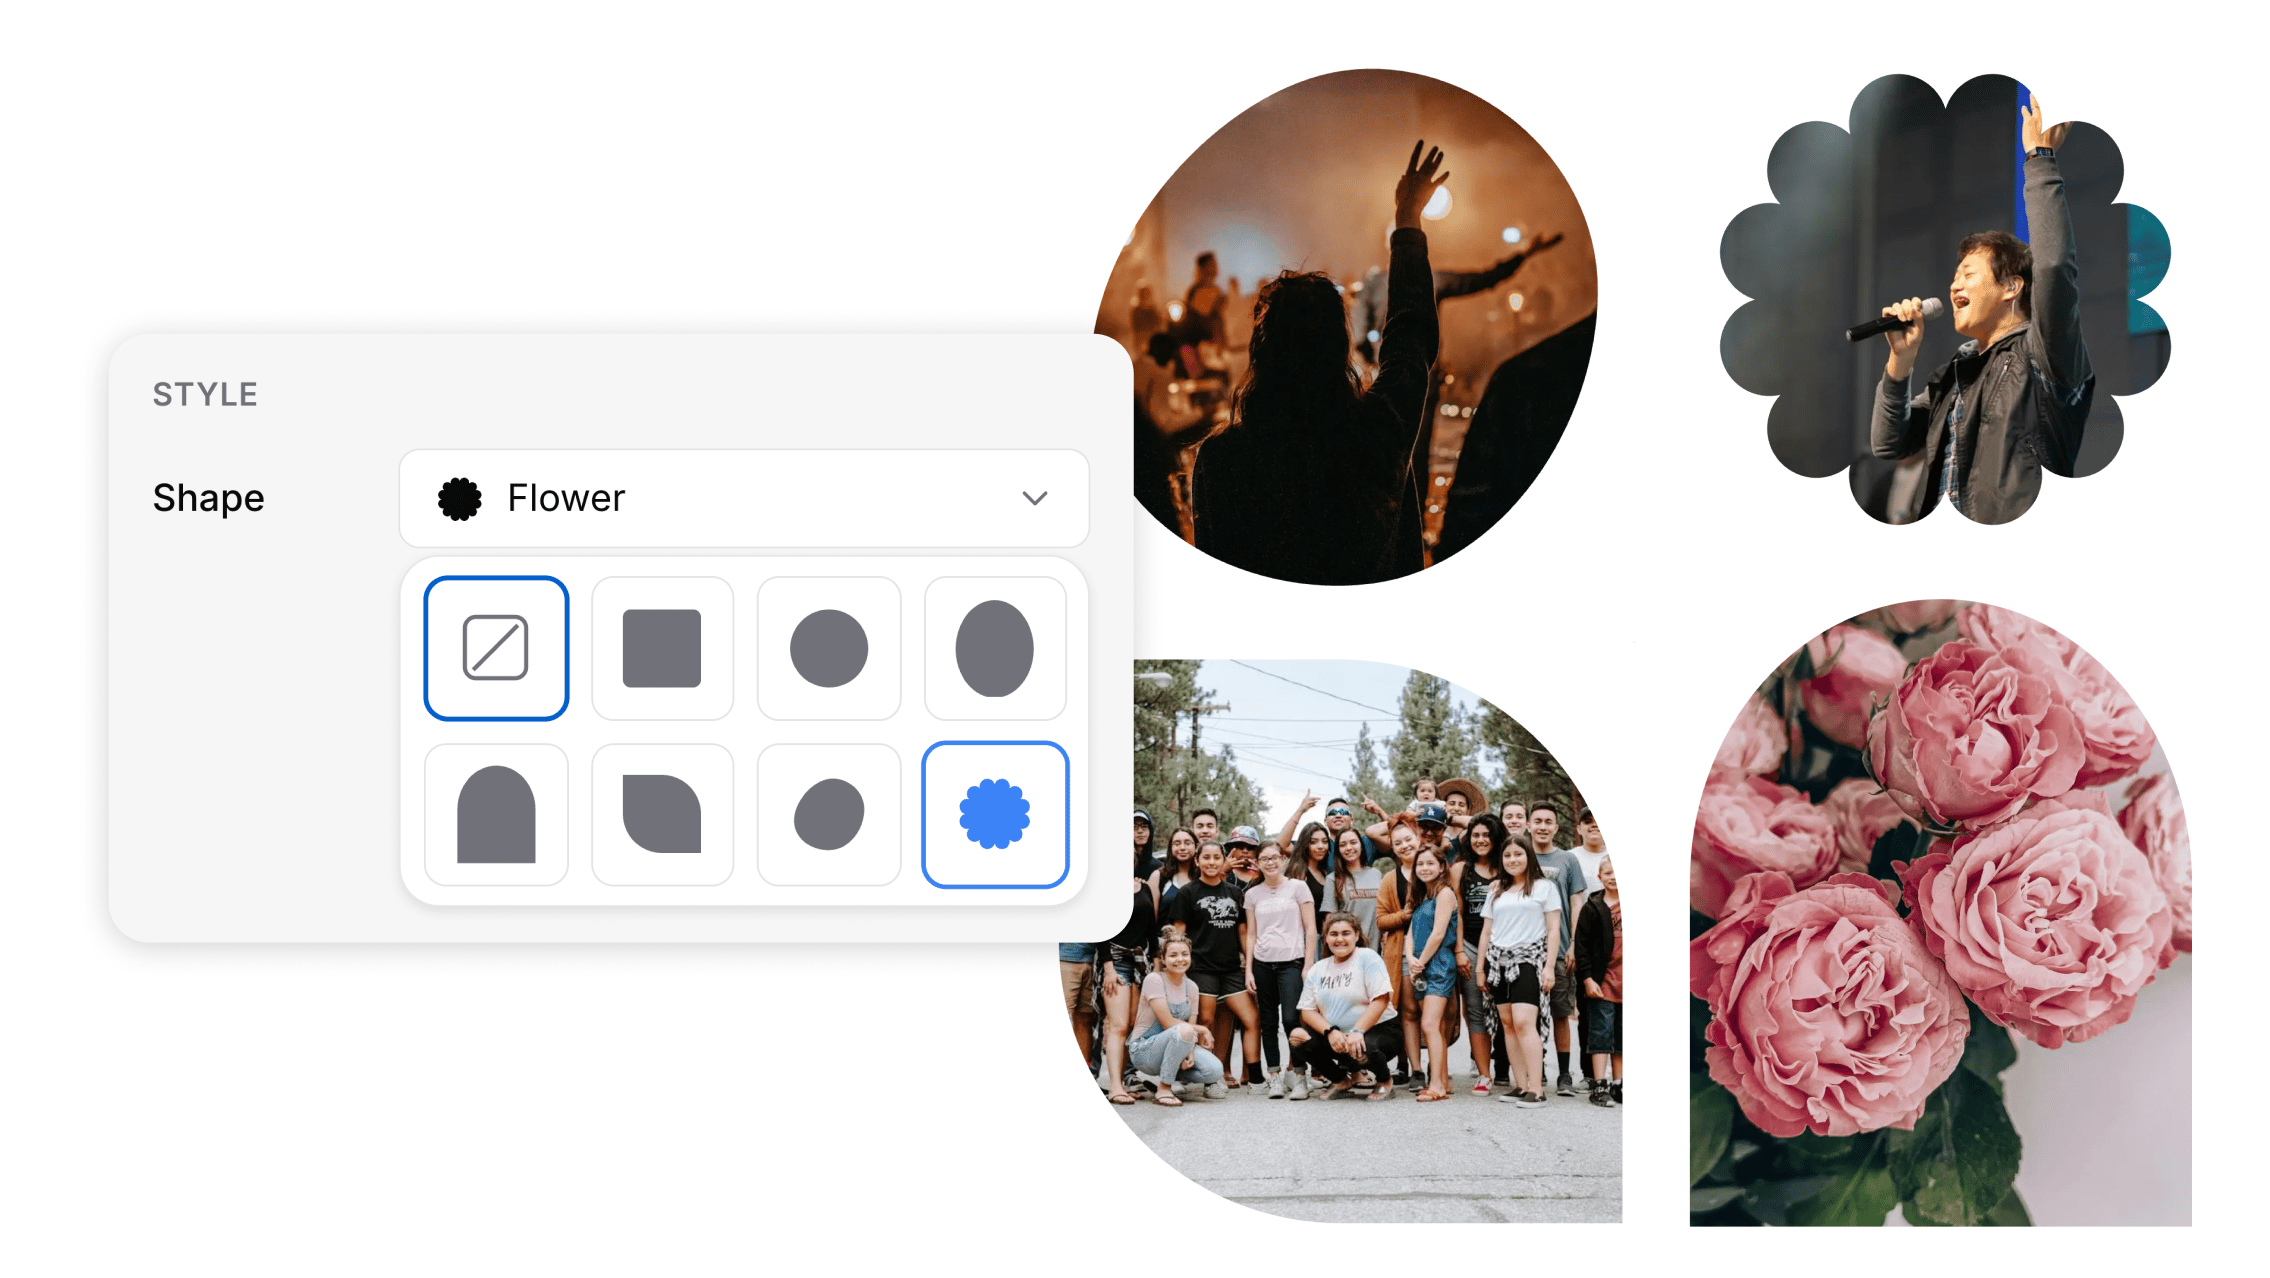 Under Style, open the Shape picker to crop your image into a shape. Choose from:
- Original: The image’s natural dimensions (no cropping). This is the default.
- Square: A square crop with softly rounded corners.
- Circle and Oval: A circular or portrait oval crop.
- Arch: A rounded window-arch crop.
- Leaf, Blob, and Flower: Decorative shapes for a more playful look.
Link
Click the link option to make the image clickable. All link types are supported:- URL, Email, Phone, SMS, File Download, Planning Center
Tips
- Always add alt text. It improves accessibility and ensures your message comes through even when images are blocked.
- Use the drag handle for quick sizing adjustments, and the sidebar width percentage for precise control.
- Shapes look best over a solid background color, since the area around the shape is transparent and shows whatever is behind it.
- If you are linking an image, consider adding a text link nearby as a fallback for recipients who may not see images.