Finding Elements
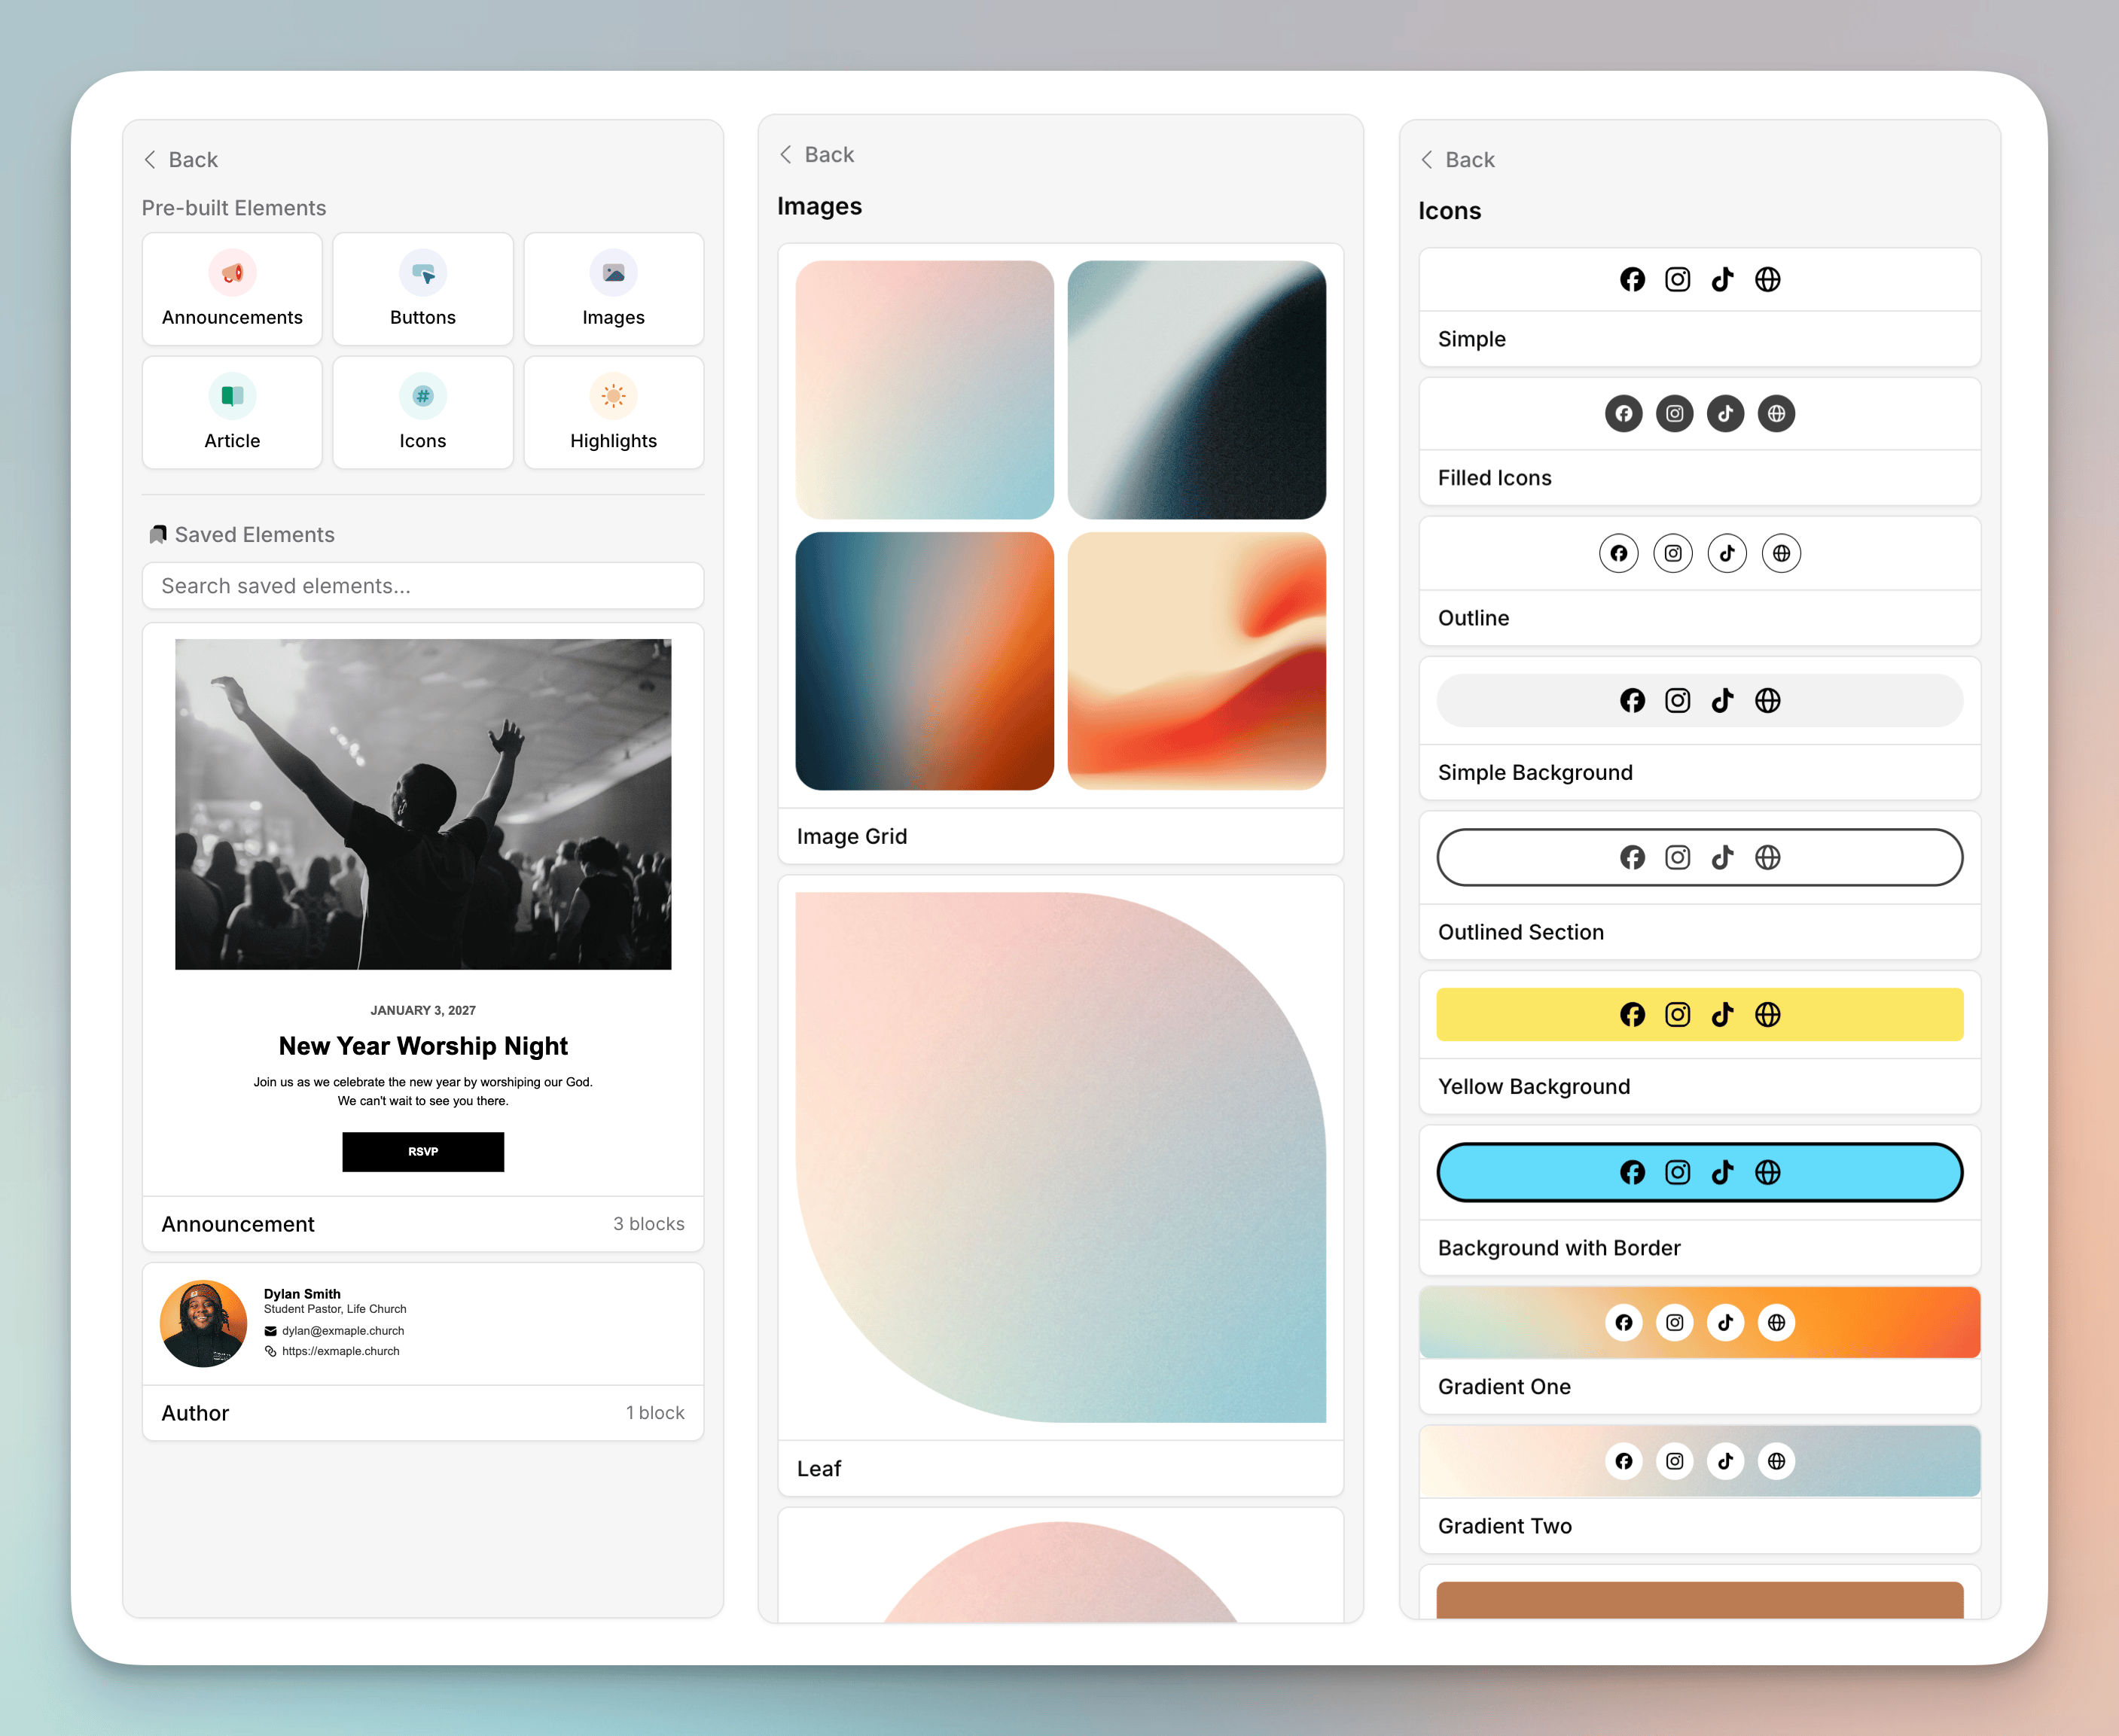
In the drag-and-drop email editor, open the Elements tab in the sidebar (alongside Styles, Footer, and Templates). You’ll see two areas:- Pre-built Elements — a library of ready-made sections, grouped by category
- Saved Elements — the elements you and your team have saved
Pre-built Elements
Pre-built elements are organized into categories so you can quickly find the right starting point:- Announcements — eye-catching sections for events, news, and calls to action
- Buttons — styled buttons and button groups
- Images — image-focused layouts
- Article — text-and-image layouts for longer-form content
- Icons — social and contact icon rows
- Highlights — sections for featuring a key piece of content
Saving Your Own Elements
Anything you build can be saved as an element and reused later. This is perfect for content you reach for again and again — a standard volunteer sign-up section with a button and social links, an email signature block with a photo and contact details, or a consistent header for your weekly newsletter. Build it once, save it, and it’s ready in the sidebar whenever you need it. There are two ways to save an element:- Save a single block — select a block, then click the Save button at the bottom of its editor panel in the sidebar.
- Save multiple blocks — select two or more blocks, then click Save as Element.
Saved elements are shared across your whole organization, so anyone on your team can drop them into their own emails and automations.
Managing Saved Elements
In the Saved Elements section of the sidebar you can:- Search your saved elements by name
- Drag any saved element into your email
- Delete an element you no longer need by hovering over it and clicking the trash icon
Tips
- Save the sections you use most (sign-up blocks, signatures, headers, footers) so your team always starts from the same on-brand building blocks.
- After dragging in a pre-built element, swap in your own images and update the text and links — the layout and styling do the heavy lifting for you.
- Combine elements with email templates: templates give you a full starting email, while elements let you drop in individual reusable sections wherever you need them.