> ## Documentation Index
> Fetch the complete documentation index at: https://help.flowforth.co/llms.txt
> Use this file to discover all available pages before exploring further.
# Adding Contacts and People
> Learn how to add and manage people in Flowforth using Planning Center, a signup form, or CSV import.
There are three ways to add people to Flowforth: syncing from Planning Center, letting people add themselves through a [signup form](/people/signup-forms), or importing manually via CSV. We recommend using Planning Center for the best experience.
***
## Recommended: Add People in Planning Center
The **primary and recommended** method for managing contacts is to add them directly in [Planning Center](https://people.planningcenteronline.com/people_imports).
* Once added, people will be **automatically synced** to Flowforth.
* If you **update an email address** for a person in Planning Center, the change will be reflected in Flowforth automatically.
* This method ensures your people data stays accurate and consistent across tools.
### Recommended: Using Custom Fields for Email Lists
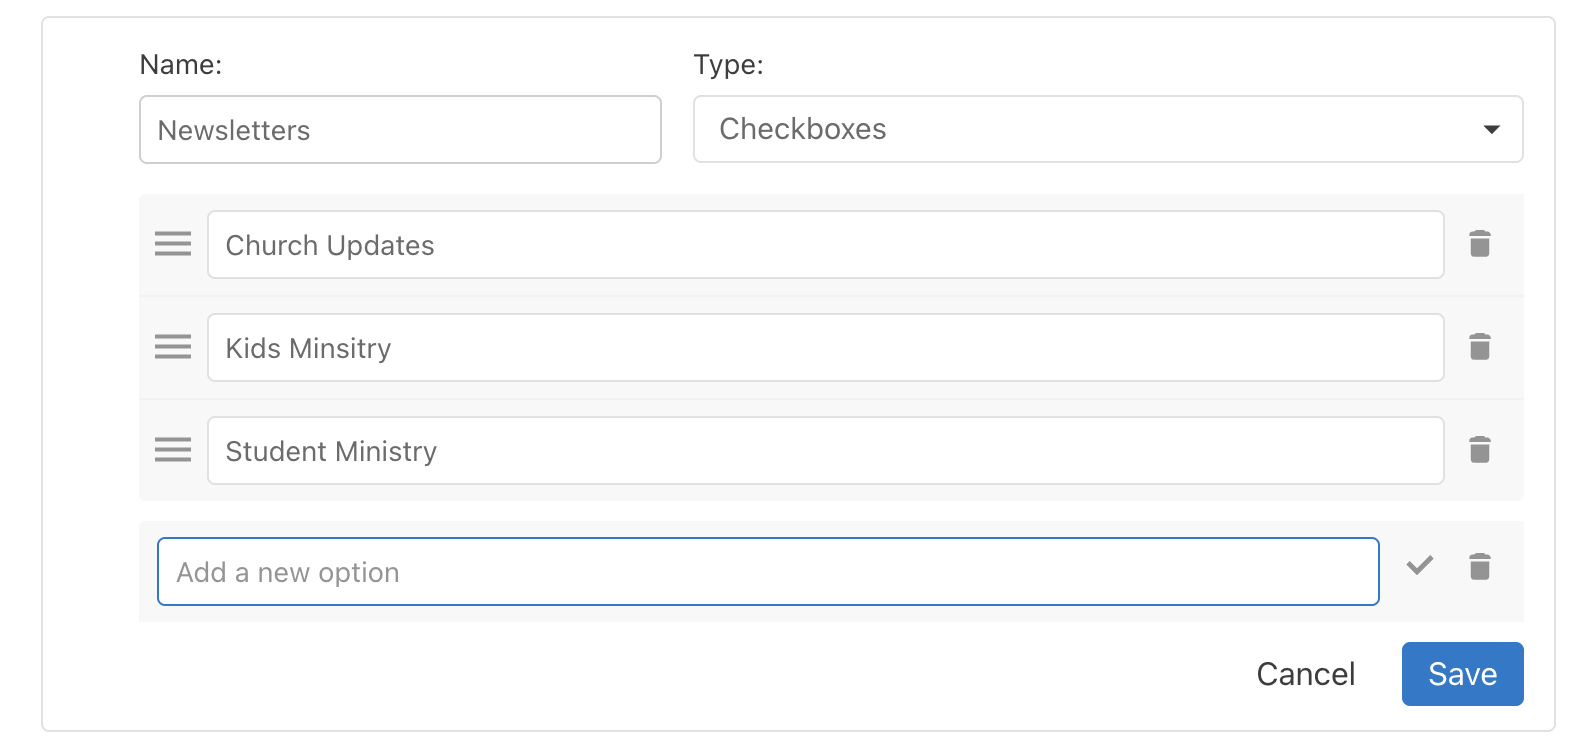
We recommend setting up a **custom checkboxes field** in Planning Center to manage your email list subscriptions. Here's how:
Go to [Planning Center Customize](https://people.planningcenteronline.com/customize) and create a new **Checkboxes** field (e.g., "Newsletters"). Add an option for each email list you want to offer (e.g., "Church Updates", "Kids Ministry", "Student Ministry").
You can either create a new custom tab for this field or add it to an existing custom tab.
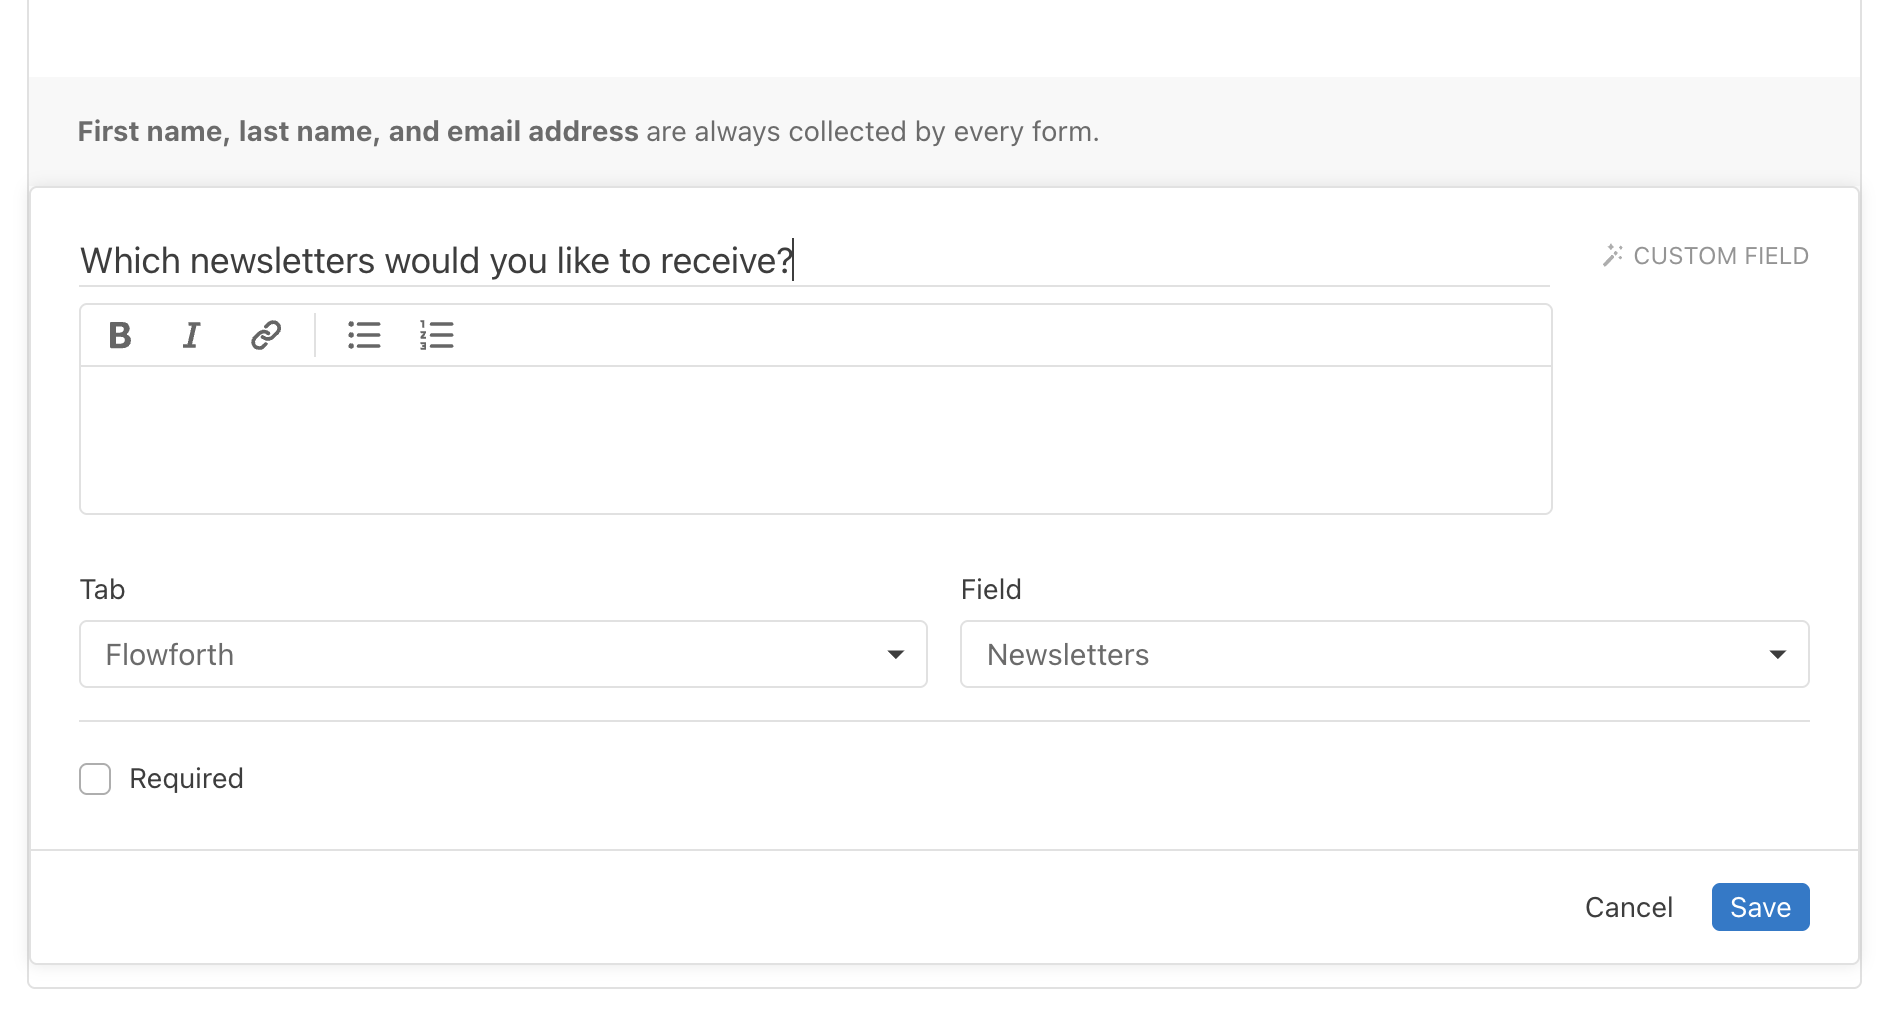
 Create or edit a form at [Planning Center Forms](https://people.planningcenteronline.com/forms) and add your custom checkboxes field. Share this form with your congregation so they can manage their own email preferences.
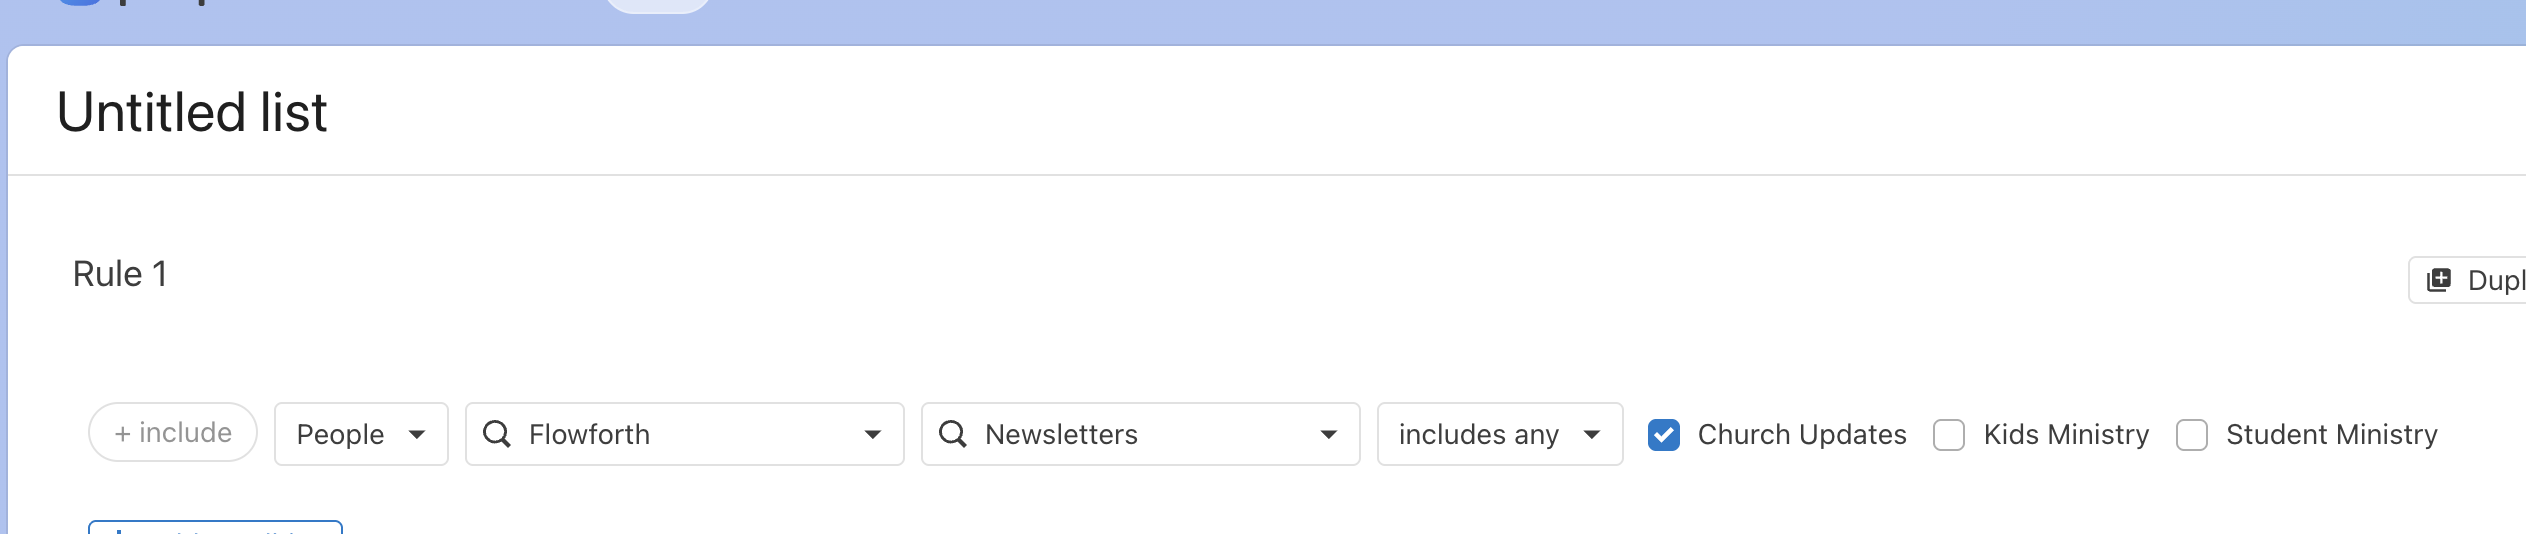
 Go to [Create a New List](https://people.planningcenteronline.com/lists/new) and set up a rule like:
**People → \[Your Custom Tab] → \[Your Checkboxes Field] → includes any → \[Select the newsletter option]**
Go to [Create a New List](https://people.planningcenteronline.com/lists/new) and set up a rule like:
**People → \[Your Custom Tab] → \[Your Checkboxes Field] → includes any → \[Select the newsletter option]**
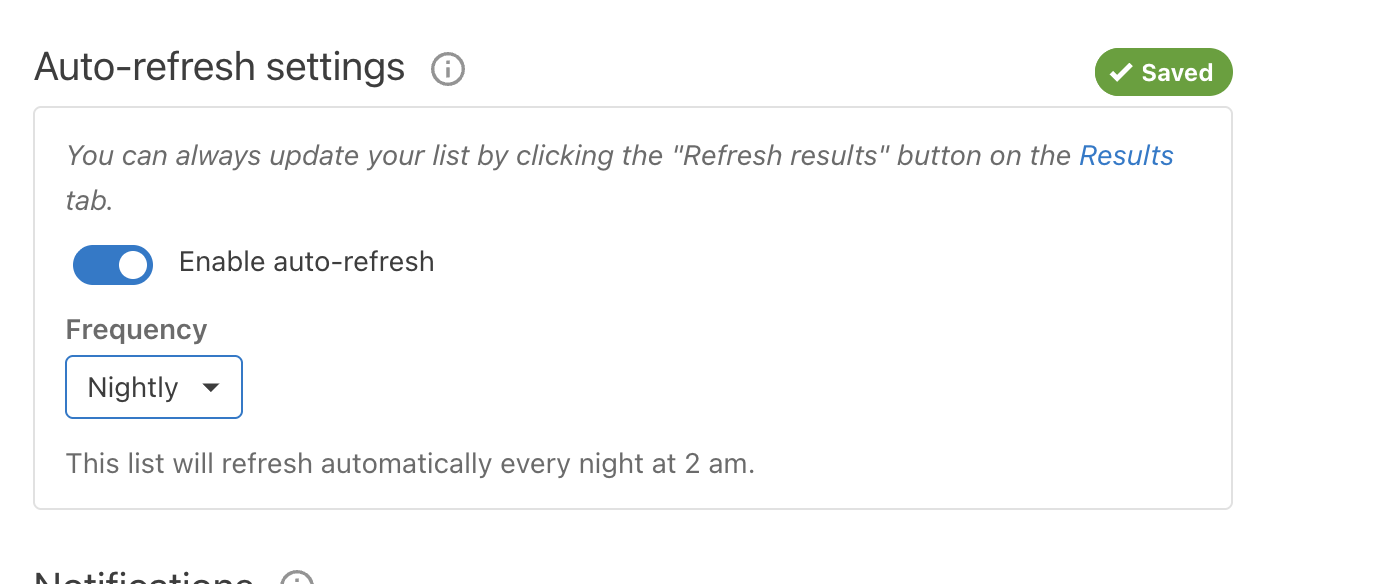
 Make sure to enable **auto refresh** on the list so it stays up-to-date as people update their preferences. These lists will automatically sync to Flowforth.
 This approach gives your people control over which emails they receive and keeps your lists automatically updated.
We do not sync email addresses that Planning Center has marked as blocked.
***
## Let People Add Themselves with a Signup Form
You can also grow your list by letting people sign up directly. Choose a Planning Center form as your [signup form](/people/signup-forms) and Flowforth gives you:
* A hosted **public signup page** at `https://your-domain/subscribe`.
* **Embeddable forms** (full and simple) you can style and drop into your own website.
Every submission is posted to Planning Center as a real form submission, so it **creates or updates the person in Planning Center People** — they then sync back to Flowforth automatically, just like anyone you add by hand. Pair the signup form with the checkboxes field workflow above and new signups land on the right email lists with no manual work.
Learn more in the [Signup Forms guide](/people/signup-forms).
***
## Importing People via CSV
If you're switching from another email platform or need to upload people in bulk who are not in your PCO account, you can use a CSV import.
Follow the instructions at:\
[https://help.flowforth.co/people/importing-people](https://help.flowforth.co/people/importing-people)
This guide covers formatting your CSV, mapping fields, and uploading your contacts safely.
Only **organization owners** can import people.
***
For help with syncing or importing, contact [support@flowforth.co](mailto:support@flowforth.co).
This approach gives your people control over which emails they receive and keeps your lists automatically updated.
We do not sync email addresses that Planning Center has marked as blocked.
***
## Let People Add Themselves with a Signup Form
You can also grow your list by letting people sign up directly. Choose a Planning Center form as your [signup form](/people/signup-forms) and Flowforth gives you:
* A hosted **public signup page** at `https://your-domain/subscribe`.
* **Embeddable forms** (full and simple) you can style and drop into your own website.
Every submission is posted to Planning Center as a real form submission, so it **creates or updates the person in Planning Center People** — they then sync back to Flowforth automatically, just like anyone you add by hand. Pair the signup form with the checkboxes field workflow above and new signups land on the right email lists with no manual work.
Learn more in the [Signup Forms guide](/people/signup-forms).
***
## Importing People via CSV
If you're switching from another email platform or need to upload people in bulk who are not in your PCO account, you can use a CSV import.
Follow the instructions at:\
[https://help.flowforth.co/people/importing-people](https://help.flowforth.co/people/importing-people)
This guide covers formatting your CSV, mapping fields, and uploading your contacts safely.
Only **organization owners** can import people.
***
For help with syncing or importing, contact [support@flowforth.co](mailto:support@flowforth.co).