> ## Documentation Index
> Fetch the complete documentation index at: https://help.flowforth.co/llms.txt
> Use this file to discover all available pages before exploring further.
# Person Block
> Display a person's profile with avatar, name, subtitle, and links in your emails.
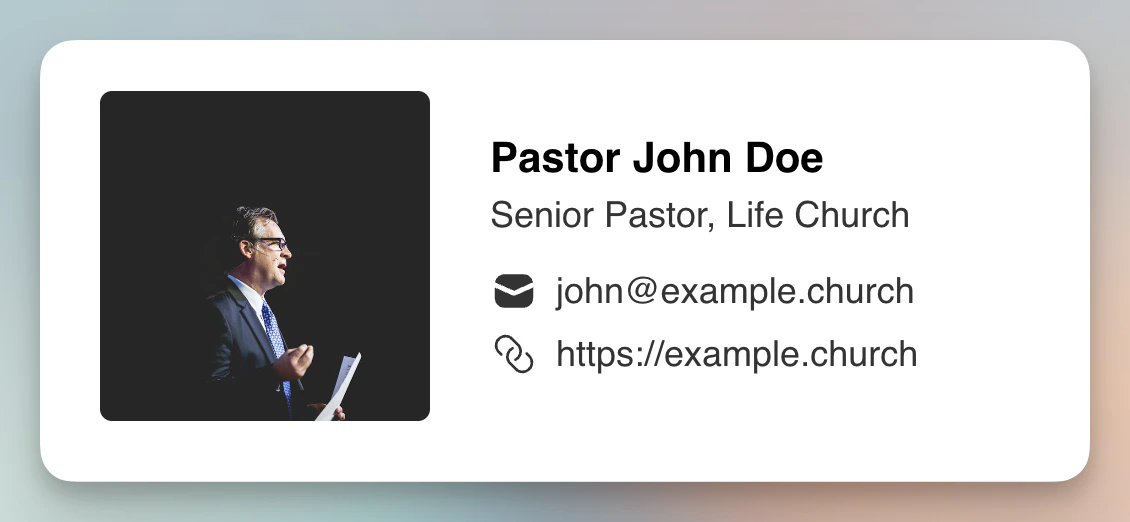
The person block shows a profile section with an avatar image, name, subtitle, and optional links. It is a great fit for newsletters, pastor messages, and staff spotlights.
***
## Adding a Person Block
Drag the **Person** block from the block palette into your email canvas. A placeholder profile will appear. Use the sidebar editor to configure the person's details.
 ***
## Person Details
Each person block includes:
* **Avatar**: An image from your asset library. You can choose between a **circle** or **square** shape, or hide the avatar entirely for a text-only layout.
* **Name**: The person's display name
* **Title**: Supporting text such as a title, role, or short bio
***
## Links
Add links to the person block. These use the same icon set as the [Icons Block](/emails/editor/icons-block), including options like Facebook, Instagram, X/Twitter, Email, Phone, SMS, and more. Each icon links to a URL or action you specify.
### Link Layout
You can choose how links are displayed:
* **Inline**: Icons appear to the right of the name and subtitle, keeping the block compact.
* **Below**: Links appear below the subtitle with text labels showing usernames or contact details (e.g., "@username" for Instagram). This is useful when you want to display actual usernames or phone numbers alongside the icons.
***
## Saved People
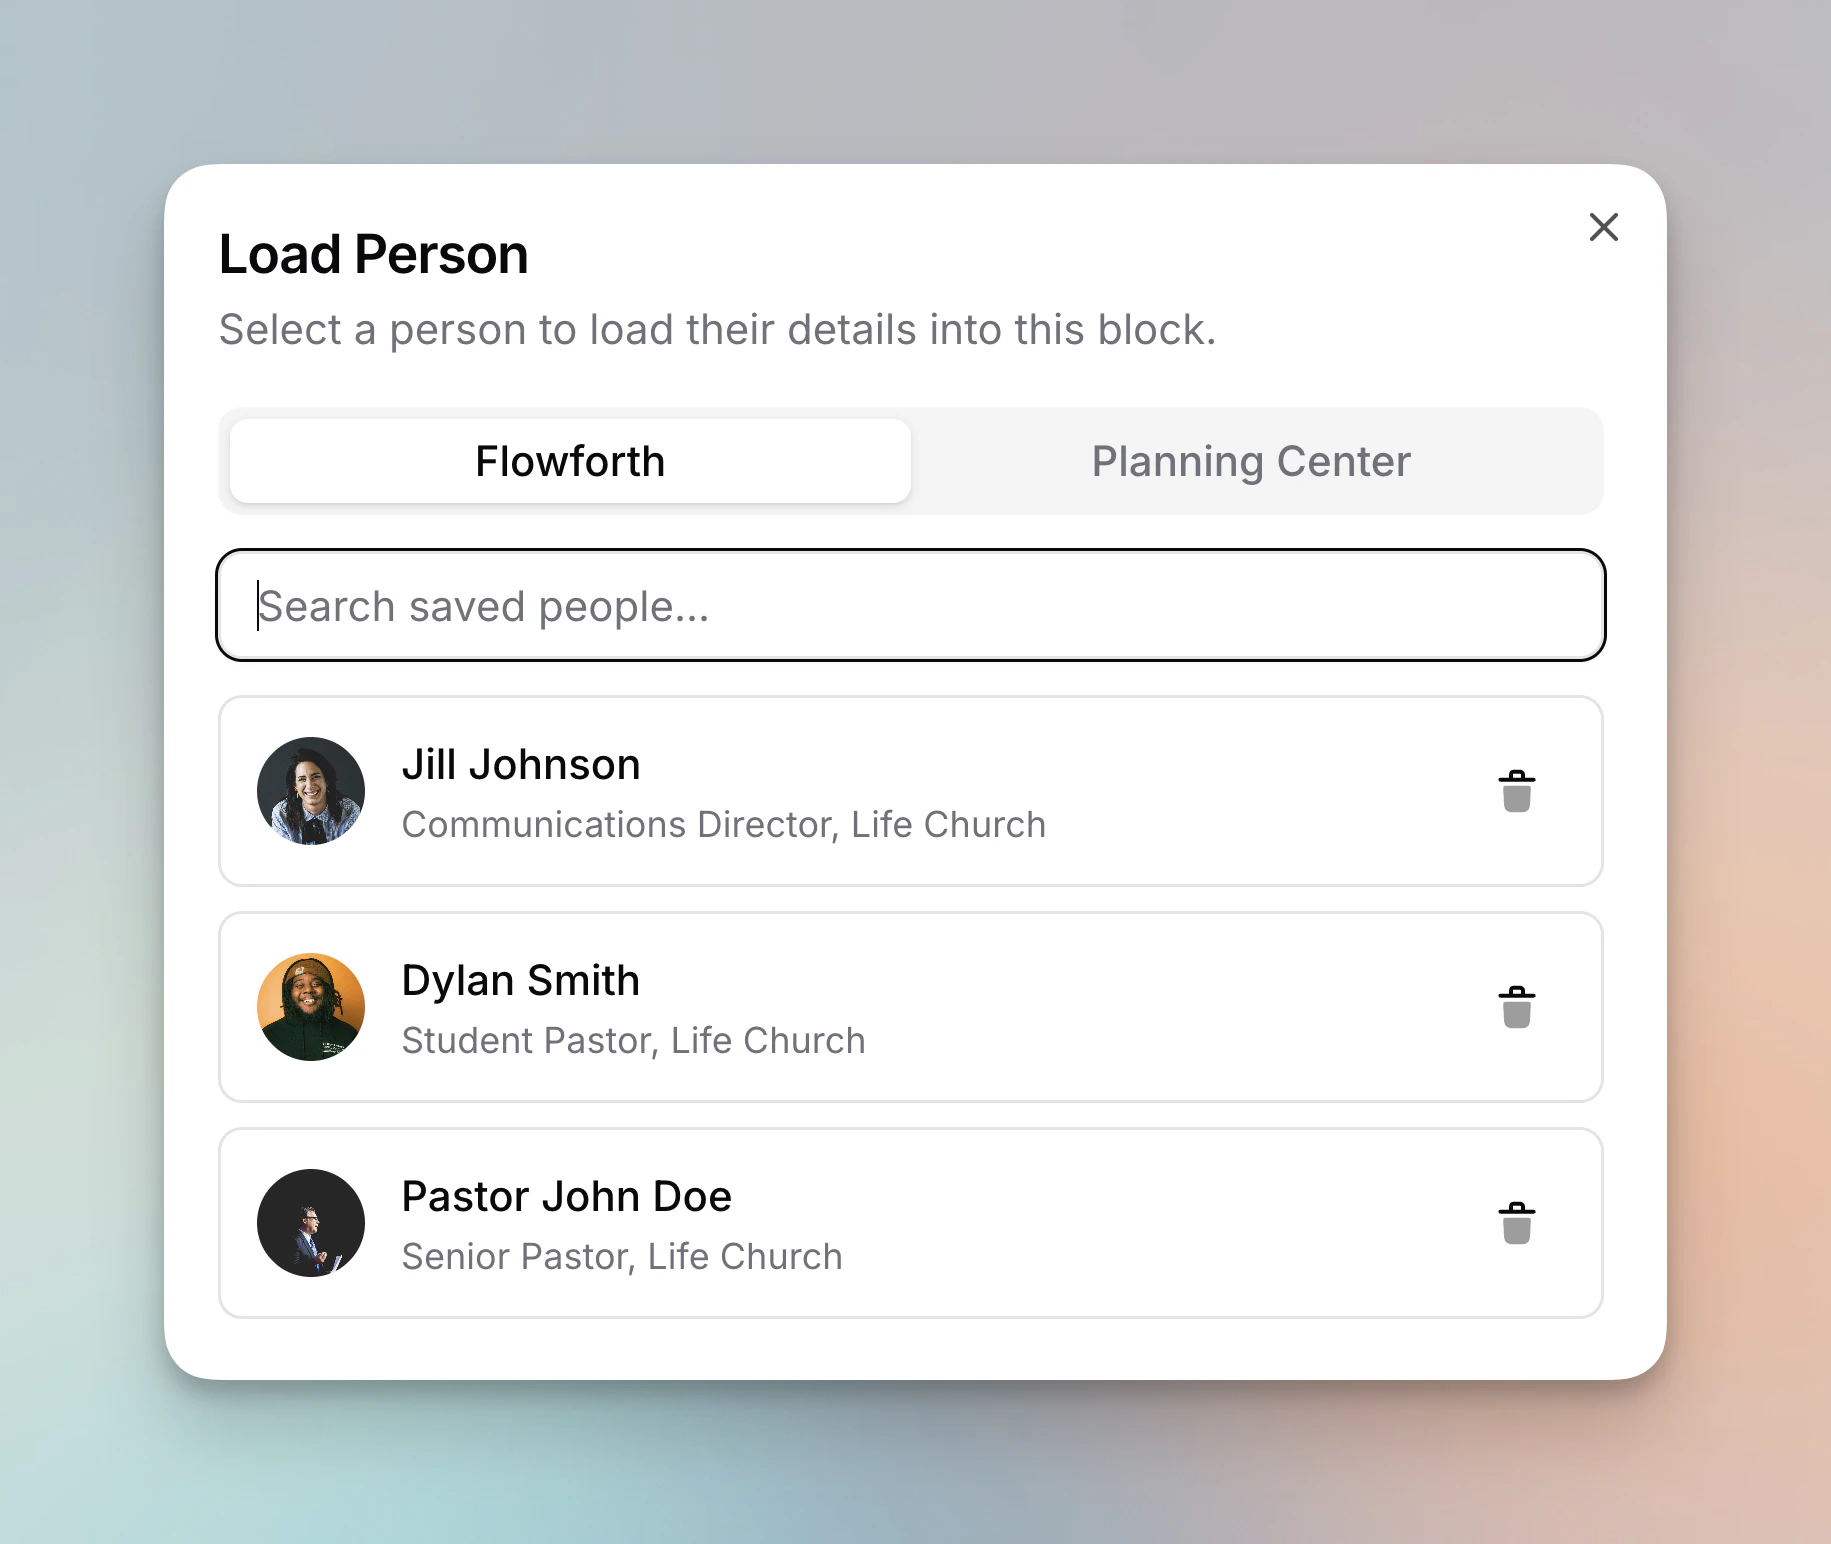
You can save a person block configuration for reuse across emails. After setting up a person's name, avatar, subtitle, and links, click **Add to Saved People** in the sidebar editor. Saved people are shared across your organization.
To load a saved person, click **Load Saved Person** in the sidebar editor and select from your saved profiles. You can also delete saved people you no longer need.
***
## Person Details
Each person block includes:
* **Avatar**: An image from your asset library. You can choose between a **circle** or **square** shape, or hide the avatar entirely for a text-only layout.
* **Name**: The person's display name
* **Title**: Supporting text such as a title, role, or short bio
***
## Links
Add links to the person block. These use the same icon set as the [Icons Block](/emails/editor/icons-block), including options like Facebook, Instagram, X/Twitter, Email, Phone, SMS, and more. Each icon links to a URL or action you specify.
### Link Layout
You can choose how links are displayed:
* **Inline**: Icons appear to the right of the name and subtitle, keeping the block compact.
* **Below**: Links appear below the subtitle with text labels showing usernames or contact details (e.g., "@username" for Instagram). This is useful when you want to display actual usernames or phone numbers alongside the icons.
***
## Saved People
You can save a person block configuration for reuse across emails. After setting up a person's name, avatar, subtitle, and links, click **Add to Saved People** in the sidebar editor. Saved people are shared across your organization.
To load a saved person, click **Load Saved Person** in the sidebar editor and select from your saved profiles. You can also delete saved people you no longer need.
 ***
## Import from Planning Center
If your organization is connected to Planning Center, you can import a person directly from your Planning Center People database into the person block. Click **Import from Planning Center** in the sidebar editor to search for a person by name, email, or phone number.
When importing, you can select which details to pull in:
* **Avatar**: The person's Planning Center profile photo
* **Email**: Choose from available email addresses (the primary email is indicated)
* **Phone**: Choose a phone number with location labels (mobile, home, etc.)
* **Profiles**: Select from any profiles attached to the person in Planning Center (Facebook, Instagram, X/Twitter, LinkedIn, etc.)
Imported details are mapped to the appropriate link types and icons automatically.
This is especially helpful for adding a team member as the sender of a newsletter or for featuring a volunteer who serves as a point of contact for the people you're emailing.
Importing a person from Planning Center copies their details into the block at
that moment. Changes made in Planning Center after importing will not update
the block automatically.
Make sure you have the person's consent before importing their profile photo,
contact information, or links into an email.
***
## Customization Options
Select the person block to open its settings in the sidebar:
* **Picture Style**: Choose between **Circle**, **Square**, or **Hidden** for the avatar shape
* **Avatar Size**: Adjust the avatar image size from 24px to 150px
* **Text Size**: Control the font size from 12px to 24px
* **Icon Layout**: Choose between **Inline** and **Below** for link placement
* **Text Color**: Set the color for the name and subtitle
* **Link Color**: Set the color for link icons
***
## Tips
* Use the person block at the top or bottom of a newsletter to attribute the content to a specific person. It adds a personal touch.
* If multiple staff members contribute to your emails, add a person block for each in the relevant section.
* Links are optional. If the person does not have public profiles, you can leave them out for a cleaner look.
* Save frequently used profiles to **Saved People** so you can quickly load them into future emails without re-entering details each time.
* The **Below** link layout works well when you want recipients to see actual usernames and contact info at a glance.
***
## Import from Planning Center
If your organization is connected to Planning Center, you can import a person directly from your Planning Center People database into the person block. Click **Import from Planning Center** in the sidebar editor to search for a person by name, email, or phone number.
When importing, you can select which details to pull in:
* **Avatar**: The person's Planning Center profile photo
* **Email**: Choose from available email addresses (the primary email is indicated)
* **Phone**: Choose a phone number with location labels (mobile, home, etc.)
* **Profiles**: Select from any profiles attached to the person in Planning Center (Facebook, Instagram, X/Twitter, LinkedIn, etc.)
Imported details are mapped to the appropriate link types and icons automatically.
This is especially helpful for adding a team member as the sender of a newsletter or for featuring a volunteer who serves as a point of contact for the people you're emailing.
Importing a person from Planning Center copies their details into the block at
that moment. Changes made in Planning Center after importing will not update
the block automatically.
Make sure you have the person's consent before importing their profile photo,
contact information, or links into an email.
***
## Customization Options
Select the person block to open its settings in the sidebar:
* **Picture Style**: Choose between **Circle**, **Square**, or **Hidden** for the avatar shape
* **Avatar Size**: Adjust the avatar image size from 24px to 150px
* **Text Size**: Control the font size from 12px to 24px
* **Icon Layout**: Choose between **Inline** and **Below** for link placement
* **Text Color**: Set the color for the name and subtitle
* **Link Color**: Set the color for link icons
***
## Tips
* Use the person block at the top or bottom of a newsletter to attribute the content to a specific person. It adds a personal touch.
* If multiple staff members contribute to your emails, add a person block for each in the relevant section.
* Links are optional. If the person does not have public profiles, you can leave them out for a cleaner look.
* Save frequently used profiles to **Saved People** so you can quickly load them into future emails without re-entering details each time.
* The **Below** link layout works well when you want recipients to see actual usernames and contact info at a glance.