> ## Documentation Index
> Fetch the complete documentation index at: https://help.flowforth.co/llms.txt
> Use this file to discover all available pages before exploring further.
# Elements
> Drag in pre-designed sections and save your own reusable elements to build beautiful emails faster.
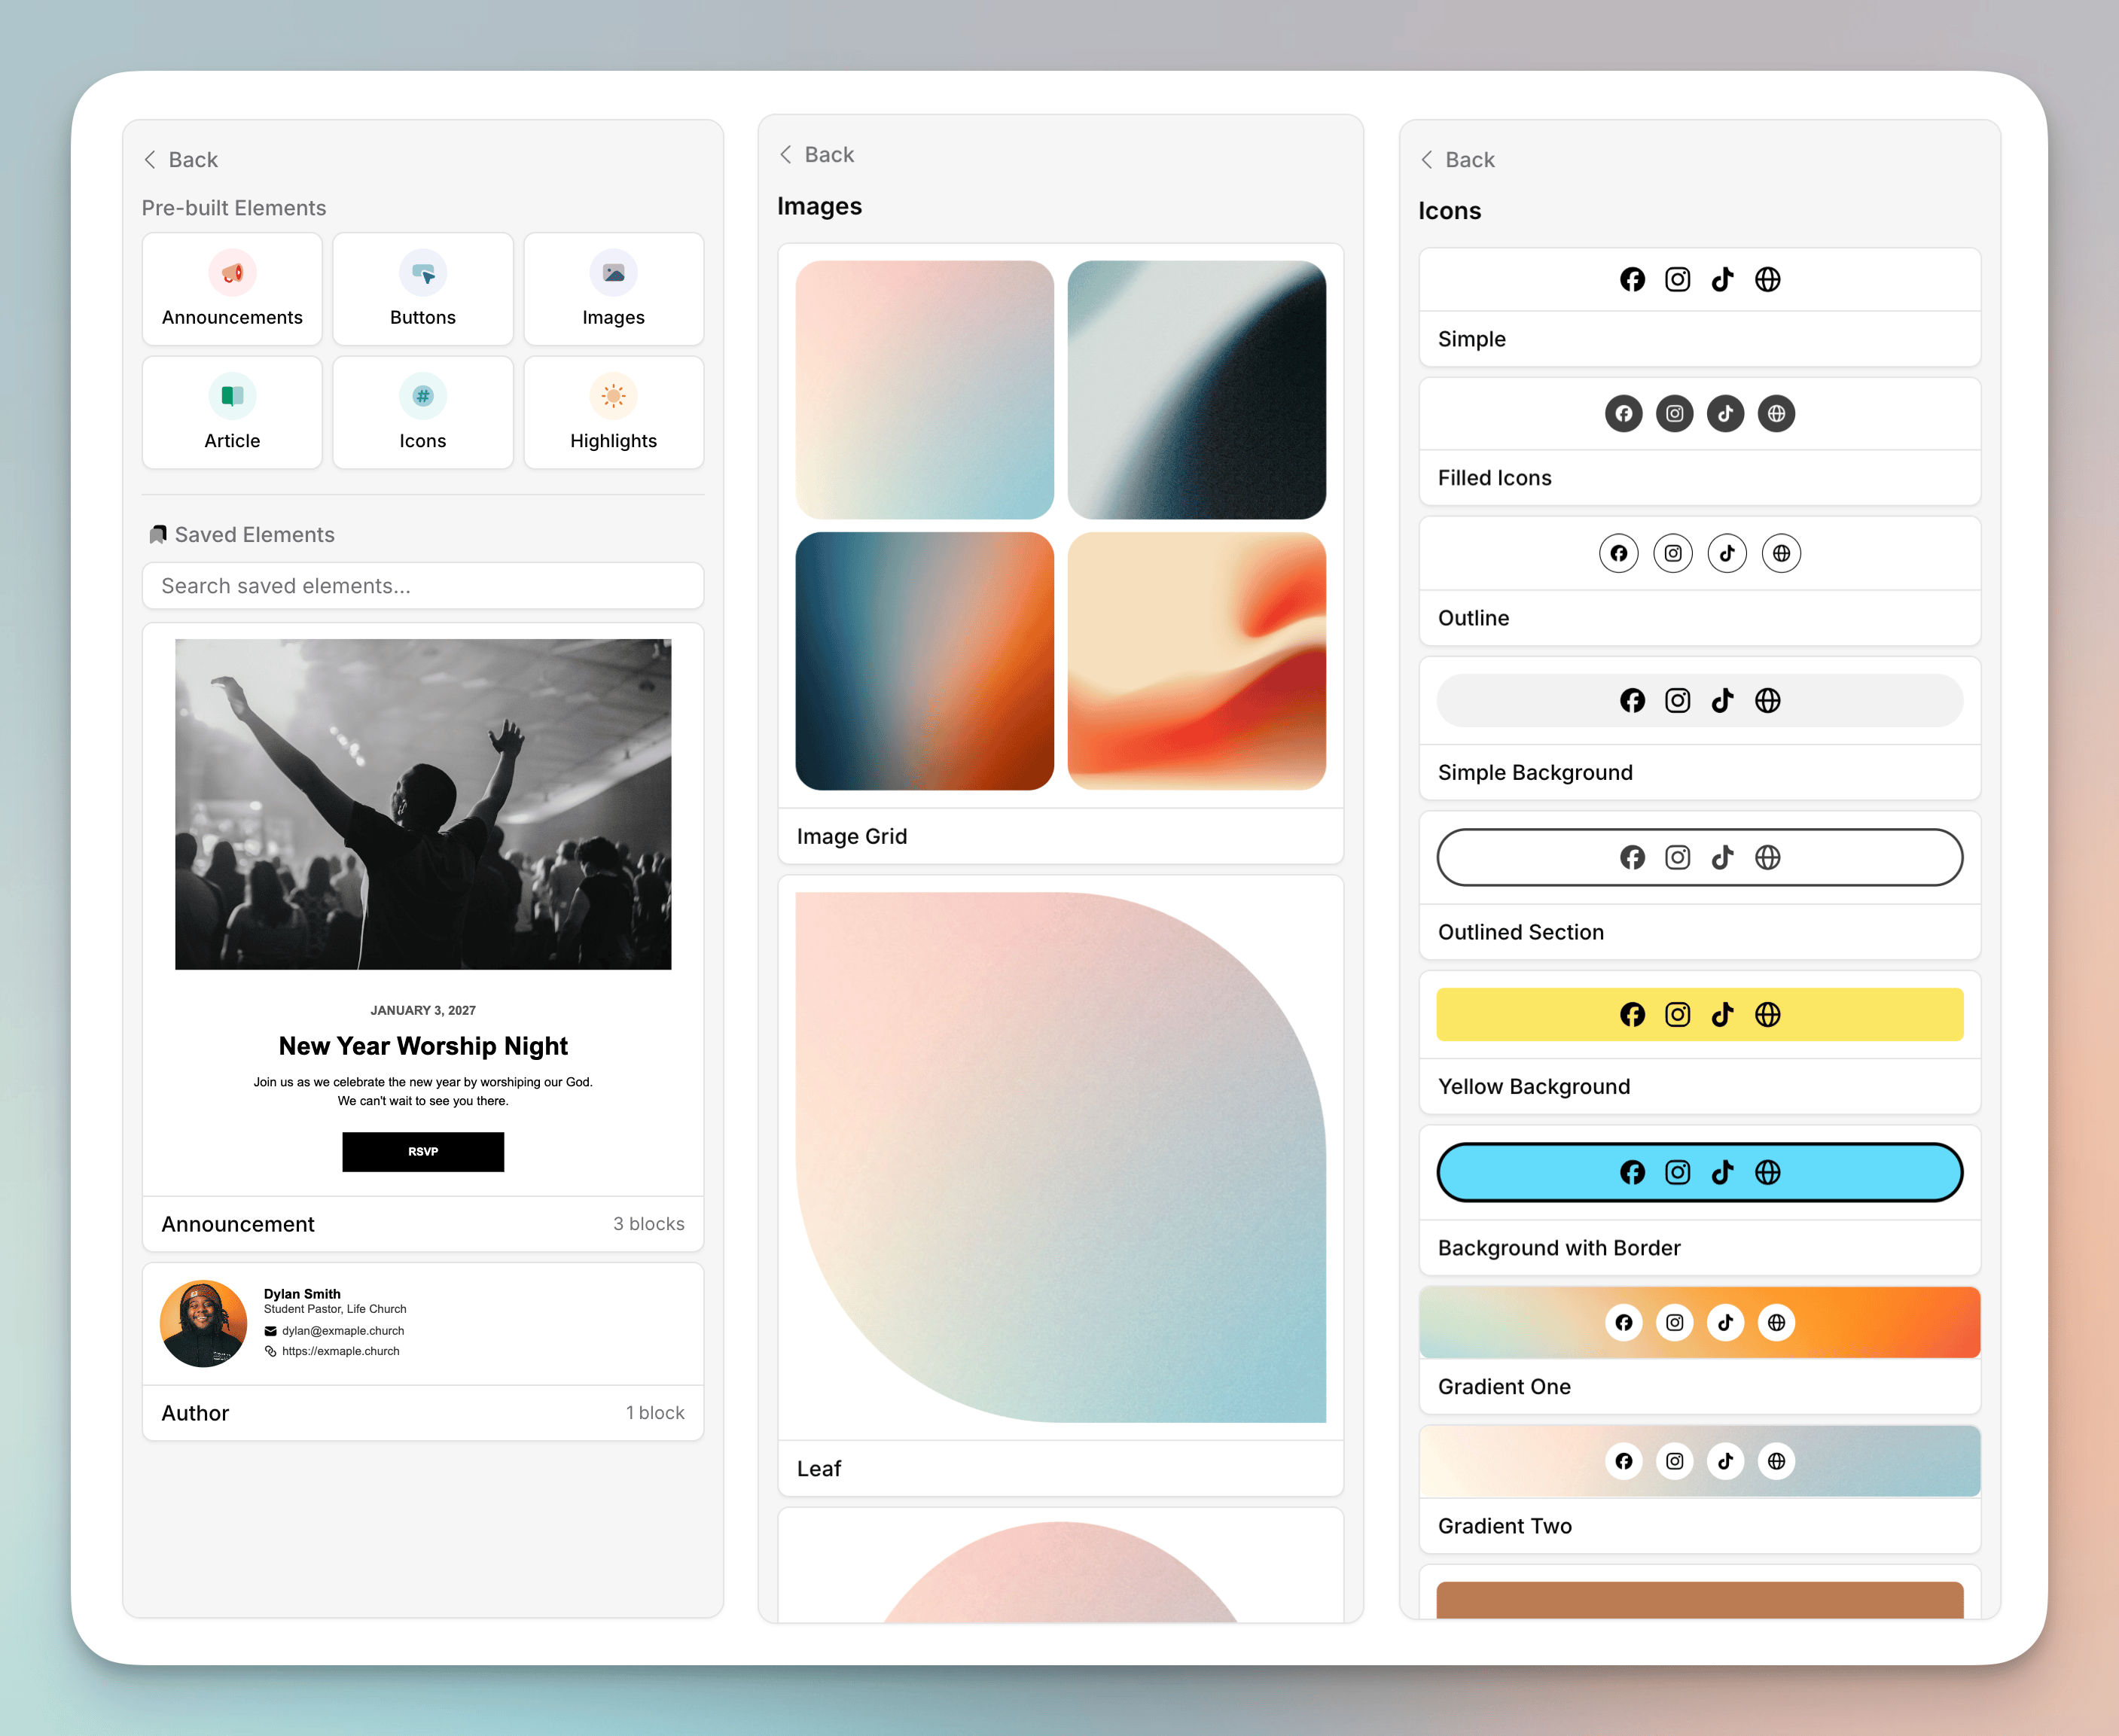
Elements help you build beautiful emails from scratch in a fraction of the time. Instead of assembling every block by hand, you can drag in a pre-designed section — an announcement, a button, an image layout, and more — and then customize it to fit your content and style. You can also save your own elements to reuse across all your emails and automations.
 ***
## Finding Elements
In the drag-and-drop email editor, open the **Elements** tab in the sidebar (alongside Styles, Footer, and Templates). You'll see two areas:
* **Pre-built Elements** — a library of ready-made sections, grouped by category
* **Saved Elements** — the elements you and your team have saved
To add an element, drag it from the sidebar onto your email canvas, just like you would a block. Once it's in your email, every part of it is fully editable — change the text, colors, images, links, and spacing to make it your own.
***
## Pre-built Elements
Pre-built elements are organized into categories so you can quickly find the right starting point:
* **Announcements** — eye-catching sections for events, news, and calls to action
* **Buttons** — styled buttons and button groups
* **Images** — image-focused layouts
* **Article** — text-and-image layouts for longer-form content
* **Icons** — social and contact icon rows
* **Highlights** — sections for featuring a key piece of content
Pick a category to browse its options, then drag the one you like into your email.
***
## Saving Your Own Elements
Anything you build can be saved as an element and reused later. This is perfect for content you reach for again and again — a standard volunteer sign-up section with a button and social links, an email signature block with a photo and contact details, or a consistent header for your weekly newsletter. Build it once, save it, and it's ready in the sidebar whenever you need it.
There are two ways to save an element:
* **Save a single block** — select a block, then click the **Save** button at the bottom of its editor panel in the sidebar.
* **Save multiple blocks** — select two or more blocks, then click **Save as Element**.
In both cases, you'll be asked to give your element a **name** (up to 60 characters) so you can find it later. A single element can contain up to 100 blocks. Once saved, it appears under **Saved Elements** in the sidebar.
Saved elements are shared across your whole organization, so anyone on your team can drop them into their own emails and automations.
***
## Managing Saved Elements
In the **Saved Elements** section of the sidebar you can:
* **Search** your saved elements by name
* **Drag** any saved element into your email
* **Delete** an element you no longer need by hovering over it and clicking the trash icon
Deleting a saved element only removes it from your library — it doesn't change any emails that already use its content.
***
## Tips
* Save the sections you use most (sign-up blocks, signatures, headers, footers) so your team always starts from the same on-brand building blocks.
* After dragging in a pre-built element, swap in your own images and update the text and links — the layout and styling do the heavy lifting for you.
* Combine elements with [email templates](/emails/email-templates): templates give you a full starting email, while elements let you drop in individual reusable sections wherever you need them.
***
## Finding Elements
In the drag-and-drop email editor, open the **Elements** tab in the sidebar (alongside Styles, Footer, and Templates). You'll see two areas:
* **Pre-built Elements** — a library of ready-made sections, grouped by category
* **Saved Elements** — the elements you and your team have saved
To add an element, drag it from the sidebar onto your email canvas, just like you would a block. Once it's in your email, every part of it is fully editable — change the text, colors, images, links, and spacing to make it your own.
***
## Pre-built Elements
Pre-built elements are organized into categories so you can quickly find the right starting point:
* **Announcements** — eye-catching sections for events, news, and calls to action
* **Buttons** — styled buttons and button groups
* **Images** — image-focused layouts
* **Article** — text-and-image layouts for longer-form content
* **Icons** — social and contact icon rows
* **Highlights** — sections for featuring a key piece of content
Pick a category to browse its options, then drag the one you like into your email.
***
## Saving Your Own Elements
Anything you build can be saved as an element and reused later. This is perfect for content you reach for again and again — a standard volunteer sign-up section with a button and social links, an email signature block with a photo and contact details, or a consistent header for your weekly newsletter. Build it once, save it, and it's ready in the sidebar whenever you need it.
There are two ways to save an element:
* **Save a single block** — select a block, then click the **Save** button at the bottom of its editor panel in the sidebar.
* **Save multiple blocks** — select two or more blocks, then click **Save as Element**.
In both cases, you'll be asked to give your element a **name** (up to 60 characters) so you can find it later. A single element can contain up to 100 blocks. Once saved, it appears under **Saved Elements** in the sidebar.
Saved elements are shared across your whole organization, so anyone on your team can drop them into their own emails and automations.
***
## Managing Saved Elements
In the **Saved Elements** section of the sidebar you can:
* **Search** your saved elements by name
* **Drag** any saved element into your email
* **Delete** an element you no longer need by hovering over it and clicking the trash icon
Deleting a saved element only removes it from your library — it doesn't change any emails that already use its content.
***
## Tips
* Save the sections you use most (sign-up blocks, signatures, headers, footers) so your team always starts from the same on-brand building blocks.
* After dragging in a pre-built element, swap in your own images and update the text and links — the layout and styling do the heavy lifting for you.
* Combine elements with [email templates](/emails/email-templates): templates give you a full starting email, while elements let you drop in individual reusable sections wherever you need them.